I hear this quite often and heard this again just last week –
“My Gmail account has become a mess and I think I should abandon this one and create a new one”.
It’s a common sight! You get too many useless emails every day adding to the already accumulated several unread emails. You start losing important emails in that daily tsunami. Also, the thus far benevolent Google must already be coaxing you to buy a plan as you are inching (if not “footing”) towards the free account storage limit (15 GB).
Creating a new Google account may appear a quick fix but is not a good idea over the long term. If you have multiple email addresses for a single purpose, you will create an overhead of tracking all of them. It’s also a great inconvenience to your audience when you have too many email addresses. Also, if you keep one of your accounts inactive, Google will eventually try to free the resource by scrapping your account.
But at the same time cleaning up your Gmail account would look like a Herculean effort. And if you are looking for that Alpheus River to clean your Augean stables, read on.
Let’s do this in two parts. In the first part, I will offer you simple steps to clean your Gmail account. In the second part, I will recommend a method that will ensure that you won’t clutter your account, in the first place.
Part A: How to clean your Gmail account
Making your account spotlessly clean may not be required. Instead, we will try to get maximum returns on your investment of time.
- Review the Composition: Your Google account comes with multiple apps, such as Gmail, Google Drive, Photos, etc., each contributing to your total storage usage. The first step is to review how much space each app is using. Use this link to view your storage usage. You might be surprised by the results and can then prioritize which app needs the most attention.
- Clear Google Photos Account: One common issue is Google Photos automatically uploading all your pictures from your Android phone to the cloud. If this isn’t your intention, you can stop it by adjusting your phone settings. To free up space already used, delete the photos from the cloud. For efficiency, use the bulk selection feature to delete multiple photos at once.
- Delete Large Files in Gmail: Start by identifying and deleting emails with large attachments. In Gmail’s search bar, enter
larger:20Mto find emails larger than 20 MB. Delete these emails to free up significant space. If you don’t find many, progressively search forlarger:10Mand so on. Continue this process until you have reclaimed enough space. - Delete Emails from Certain Senders: Identify senders from whom you receive many emails that you no longer need. Use the search bar with the sender’s email address, e.g.,
from:newsletter@blahblahtech.com. Select all emails from this sender by clicking the checkbox above your inbox and then clicking “Select all conversations that match this search.” Confirm the deletion to remove all emails from this sender. - Delete Unread Emails: Accumulating unread emails can be common. To clear them, search for
label:unreadin Gmail. Use the bulk deletion feature mentioned above to remove these emails efficiently. - Delete Obvious Emails: If your Gmail is configured with three tabs—Primary, Social, and Promotions—go to the Social and Promotions tabs and delete emails in bulk. Most of these emails are notifications and can be deleted easily. Use the technique from previous steps to select and delete all emails in one action by choosing “Select all xxx conversations in.”
Part B: How to manage your emails to not accumulate too many of them
Our strategy here is to keep count of your unread emails to zero. Yes, you are hearing it right – Zero!
You should first ensure that your Gmail is configured to have three tabs – Primary, Social, and Promotions. This will keep most of the clutter away and you will be able to focus on the right things that are in the Primary tab.
You should process your emails as regularly as possible. Of course, I am not advising you to watch for every notification, but the idea is to not let the number of emails grow to such a size that you need a big-time slot to clear them, which you will never get anyway. Please note, that what I am advising here is to “process” the emails and not “do” related work:
1. Make a quick first pass for deleting those emails that you don’t even want to open. You need to take a clear and hard decision here. Gmail offers a delete icon right on each mail item when you hover on it. Click on the delete button to delete a particular item.
2. If you are regularly deleting items from certain senders consider unsubscribing to them, and that will reduce the burden of deleting them. Unsubscribing to the mailers is automated and quick, of late.
3. If you like to read the contents of a newsletter at leisure, instead of leaving it unread, check for the availability of that content on a website. Most newsletters offer a web link too. Go to that link and push those pages to a Read later App, like, Instapaper. Of course, you need to develop a habit of frequently clearing stuff from the Read later App as well. One good idea is to install the Read later App on your phone also and keep the shortcut on the home screen.
4. Keeping the emails unread to mark your pending actions is not a good practice. Consider writing the identified actions in your to-do list, instead.
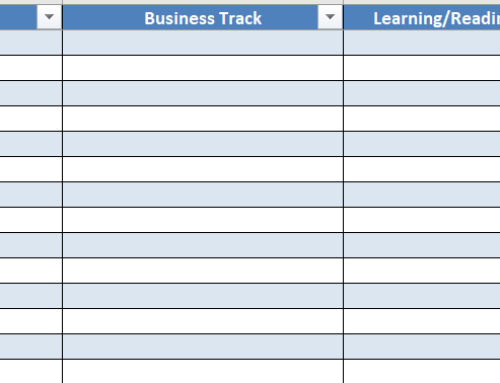
5. You should also copy and save the useful email attachments, in a separate well-organized reference system. This will ensure that you would not run to your Gmail, whenever you need that thing.
All that you delete will go to the Trash folder. You don’t have to delete them from Trash as they get cleared anyway later. Moreover, you have an opportunity to restore it if you want something back.
Once you implement these ideas, you would have tamed this giant. You will find yourself organized and productive too.
Subscribe to my newsletter, to get tips like this and more, directly in your inbox!